Showing posts with label China Glaze. Show all posts

Wednesday, 25 December 2013

Hello lovelies!! I'm a little late posting today, but right after finishing these this morning I had to immediately leave. How immediate? Immediate like I was terrified I was going to smudge them while getting dressed - thank goodness for my trusty Seche Vite top coat! The chance of smudging made me snap a few quick pics and then I was out the door. I just now settled down to watch some Christmas Doctor Who (goodbye, Doctor #11 ??) and realized I never got around to taking the pics off my camera. So, here's my Christmas mani ... late but at least it's still Christmas. :)


I wanted a mani that I could wear after Christmas. Once Christmas is over I want Christmas over so I went simple - more winter than truly Christmas. I started with 3 coats of CQ Pearls and then topped it with 2 coats of Firefly from Hell.


If you'll remember Firefly from Hell was the glow-in-the-dark glitter topper from my Halloween collection. There are still a few of these glow polishes left if anyone wants one; you can get them on sale for $6 in my Storenvy shop. :) I adore how the stamped snowflakes still show up in the dark!!


I think I'm getting better at this whole stamping thing!! These snowflakes were done in mere moments (with China Glaze Blue Bells Ring) as I was in such a hurry and they're almost all there - only a few smudges and missing lines. And, as you can see, I also added a pearl to the center of the large snowflake on my ring fingernails. I think it added a slightly elegant, dressy touch.

So, how was your holiday? Do anything special? Wear anything special on your nails? How about gifts?? Did you get everything you asked Santa for? :)

Until next time,
-Ashley

Monday, 29 April 2013

Hey everyone! Sorry for dropping off the face of the Earth. My slight cold turned into a full blown cold and has me still sniffling, sneezing, and coughing. In an effort not to fall behind in the Disney Challenge, I've decided to skip The Lion King and simply come back to it at the end of this challenge. I've also decided to keep today's mani for Tangled very simple.


Like I said, I kept today's nails very simple. One of my favorite parts of the Tangled movie was when Rapunzel finally saw the lanterns in person. The absolute awe and amazement on her face is priceless. So I tried to recreate what she saw. I used Revlon Enchanted, Rimmel I Lilac You, Petites Color Fever Periwinkle and China Glaze First Mate for the night sky background. Then I used a very small piece of sponge to dab on some of the flakies from Essie Shine of the Times. I think these flakies create the perfect lanterns!!


For those of you who haven't seen the movie, this is the scene I attempted to recreate. :)


Up next in the Disney Challenge: 101 Dalmatians! I already have this one sketched up. :)

Up next on the blog is another mani for the Time Periods Challenge. This one Imperial China. I'm stumped on this one. :(

Goodbye April. Hello May!

Wednesday, 3 April 2013

Late night post!! I'm sorry for the lack of actual nail posts lately. I just really haven't been feeling very inspired. It might have something to do with this. I had absolutely no idea what to do for Ancient Mayan in the Time Periods Challenge. I'm not a history buff. I have a few eras I like, but I mostly look to the future. I know nothing about the Mayan culture. If there wasn't the recent hubbub about the end of the world thanks to the Mayan Calender I likely wouldn't know anything about Maya at all. I searched and searched all week and finally found something last night. It feels a bit like a cop out but ...

Spellbound Nails Nail Lacquer Polish Time Periods Challenge Ancient Mayan Maya Jaguar gods demi-gods protectors animal print China Glaze On Safari Kalahari Kiss Desert Sun sponge sponged gradient

Mayans worshiped many jaguar gods, demi-gods, and protectors. As I said, I know nothing about Mayan culture, but I found this really interesting. Why? Because I love big cats!! They should totally be worshiped! I actually looked into colleges with programs that would let me work with these beauties, but found nothing that would let me do exactly what I wanted. I even looked into volunteering at big cat rescues, but there were sadly none near enough.

So, if you haven't figured it out yet, my nails are jaguar print. I really try to stay away from most animal prints. They've been done a hundred thousand times before by nearly every blogger under the sun. There's really nothing new that can be done with these prints. But I really did enjoy doing these nails ... twice since the first attempt was a messy disaster!

Thursday, 7 March 2013

And so ends the ABC Challenge. I am terribly sad to see this challenge over. I almost want to start all over again because there are so many letters that I had multiple nail art ideas for. Take Z for example. There's zebras, zombies, and zigzags and the one I went with: 

Z is for ... Zippers

nails nailart nail art mani manicure polish Spellbound Lacquer ABC Challenge Z is for Zipper Zippers tutorial Shimmer Polish Mary black silver white red China Glaze Adventure Red-y L.A. LA Colors Circuits Energy Source Pure Ice Silver Mercedes glitter unzipped

I did this design completely backwards. I was working on swatching Shimmer Polish (swatches coming next week) when I was hit with the idea of zippers opening up to reveal Mary in all it's glittery glory.

I think it turned out pretty great considering I had to draw everything around that small V of Mary you see. To learn how to do a traditional zipper nail and not my backwards version you should definitely check out this picture tutorial found on Beautylish.

Will any of you be joining me for the Inspired by Time Periods Challenge??

Wednesday, 19 December 2012

This one took a lot of thought and still feels a bit like a cop out. With Christmas on the brain and O being the letter of the week in the ABC Challenge I knew more than a few of my fellow challengers were likely to do ornaments. I strive to be different in this challenge�to think outside the box. However, what else was there for O that still fit into my holiday themed posts?

O is for Oh Christmas Tree.

nails nailart nail art polish mani manicure Spellbound OPI France Collection Tickle My France-y Essie Luxe Effects Shine of the Times flakie flakey flakies glitter nude tan holiday China Glaze Winter Holly green Wet n Wild Fergie Hollywood Walk of Fame star red gold ABC Challenge O
Shade

I used OPI Tickle My France-y as the base. This was my first time using this color and I'm left wondering why I never used it before. It is so beautiful!! On top of this color I used my brand new bottle (bought on Amazon with a gift card from Swagbucks.com) of Essie Shine of the Times. Can I say wow? These two colors are amazing together! They create a very elegant and glamorous look. I will say Shine of the Times looks best (in my opinion) in the shade. It's the reason for such a dimly lit picture.

From there I used two pieces of tape to create a triangle on my ring nail, filled that in with China Glaze Winter Holly and topped it with a red star dug out of Wet n Wild Fergie Hollywood Walk of Fame.

Monday, 17 December 2012

This swatch was supposed to go up last Friday, but it just didn't feel right posting after the devastating tragedy that happened in Newtown, Connecticut. My heart goes out to the families of both the children and the brave teachers who worked to protect and calm their students during the attack. I don't have children myself, but I have nieces and nephews and to think that something could happen to someone so young and innocent is horrifying. I am at a complete loss of words except the always unanswerable question of WHY??

Two Coats with Top Coat

This is Glitter All The Way, the last of the polishes I own from the China Glaze Holiday Joy Collection. I think the name of this polish is simply wonderful. One of the best holiday names for this brilliant holiday collection.

One Coat

I don't know if I'd consider this glitter truly holiday though. To be honest, I'm reminded more of Mardi Gras than Christmas, but I guess that's a holiday too ... just not a December holiday. The colors are beautiful no matter what holiday this is for. I couldn't seem to truly capture them sadly. The light reflected off this glitter all wrong for my camera but was stunning to behold to the eye. I like the way one coat of Glitter All The Way looks, so I think I'll be wearing this as a layering glitter.

Two Coats with Top Coat

For all that it's pretty, I will say I found this glitter hard to work with. It came out of the bottle pretty dry and clumpy and refused to spread out on my nail. I used two coats to get opaque, but I think that was simply because my coats had to be thick to get glitter to cover my nail. This thickness left my nails tacky for much longer than any of the other glitters of this collection and you can see in this picture the dent in the polish on my middle fingernail. I thought my nails were dry enough for pictures about an hour after doing them but a small bump and they dented easily.

Color: Small green hex glitters with purple, red, and bright yellow-gold micro-glitters in a clear base. The most noticeable colors are definitely green and purple.
Finish: Glitter
Application: Not great. There seems to be too much glitter and not enough clear base. This makes the polish dry and the glitter sticks together; you think this might be a good thing but it just makes it hard to spread. Hard to spread means fairly messy.
Coats to Opaque: 2-3 depending on how well your bottle of Glitter All The Way spreads and how thin you can keep your coats. Mine didn't spread well so my two coats were thick.
My Rating (1-5): 4

Thursday, 13 December 2012

Today's late night post is Angel Wings, another from the China Glaze Holiday Joy Collection.

nails nailart nail art polish mani manicure Spellbound China Glaze Holiday Joy Collection color swatch Angel Wings gold green holo holographic glitter
Two Coats with Top Coat

Oh boy, what is there to say about Angel Wings? It's not me. It's a mildly pretty color, but not on me. This collection was picked up by someone else with my wish list. I should have waited until the swatches started coming out because this is something I would not have checked out with.

nails nailart nail art polish mani manicure Spellbound China Glaze Holiday Joy Collection color swatch Angel Wings gold green holo holographic glitter
One Coat

Like all of the ultra-fine glitters of this collection, Angel Wings goes on thin and patchy with one coat but fills in nicely with two.

nails nailart nail art polish mani manicure Spellbound China Glaze Holiday Joy Collection color swatch Angel Wings gold green holo holographic glitter
Two Coats; no top coat

I'm really coming to love the texture of this collection. I'm sure if left without top coat it would catch on everything, but it looks so gorgeous!

nails nailart nail art polish mani manicure Spellbound China Glaze Holiday Joy Collection color swatch Angel Wings gold green holo holographic glitter
Two Coats with Top Coat

And again, as with all the glitters of this collection, it takes two coats of top coat for a smooth finish. I didn't get any really great pictures that showcased the amount of holographic glitter in Angel Wings, but this one gives you a small idea. Imagine this times three. Seriously, there is so much holo packed into this that I am stunned I couldn't get a picture of it. :)

Color: Green gold with lots of holographic
Finish: Ultra-fine glitter
Application: Patchy with one coat but builds up nicely with two. This one didn't need much dabbing and pushing to cover my nails.
Coats to Opaque: 2-3
My Rating (1-5): 3.5

I feel I kind of have to explain my rating on this one. This rating is my own personal rating. I gave it points for the formula and application but I really, really don't like this color. I think it's the worst possible shade of gold China Glaze could have created. Far too green tinted for my tastes.

Wednesday, 12 December 2012

Two posts in one day?? Yes!! There has been an influx of Hanukkah nail art, but I still come up with very little in search engines. I'm not Jewish, but I don't think there can ever be enough nail art for holidays, any holiday. So I felt it was my nail artist duty to contribute. :)


nails nailart nail art polish mani manicure Spellbound Happy Hanukkah Chanukah holiday Star of David gold silver blue China Glaze Blue Bells Ring Pure Ice Silver Mercedes candle fire flame stripes

This is based around a really beautiful menorah I saw in one of my Hanukkah searches. There were, of course, four candle holders on each side and rising up from the middle was a Star of David candle holder. There were no candles in the holders in the picture but I could just imagine how stunning it would look all lit up.  I just had to use that Star of David and put a candle on top.

As for the other nails, I thought this all deserved a beautiful and simple background to draw attention to the accent nail. After two disasters with tape, I finally just free-handed the stripes using China Glaze Blue Bells Ring over Pure Ice Silver Mercedes.


If there is ever a holiday coming up that you want to see nail art for let me know. I barely follow US holidays let alone those internationally, but I would love the chance to attempt nail art for your favorite holiday. Leave me a comment or Contact Me so I can mark them on my calendar. :)
Okay, so I usually have at least some build up before announcing the design, but I can't contain my excitement with this one. N is for ... North Pole.

nails nailart nail art polish mani manicure Spellbound ABC Challenge n is for It's snow snowing at the North Pole night winter Christmas holiday China Glaze First Mate Secret Periwinkle Peri-Wink-Le Poinsettia

Yes, it's snowing at the North Pole. :) I love this design and wore it all last weekend. Forgive the horrible writing on the sign. I couldn't find my thin detail brush. 

Can you tell how much I love this China Glaze color?? The bottle of the darker blue I use in these 'night time' designs is just as worn. For those wondering, this is Secret Peri-Wink-Le and the darker blue is First Mate. I mix them with a bit of black (sometimes I just use the black straight depending on the design and how much light blue I've used) and white to complete the gradient look.

Tuesday, 11 December 2012

Today's swatch is definitely one of my favorites from the China Glaze Holiday Joy collection. Right under Cranberry Splash and tied with Pure Joy.

nails nailart nail art polish mani manicure Spellbound China Glaze Holiday Joy Collection color swatch Champagne Kisses Pure Joy gold rose red glitter Christmas New Year's Eve
Two Coats; Lightbox

I'd like to introduce you to Champagne Kisses. This is a rose gold glitter with a small amount of holographic glitter suspended in a clear base. It's the perfect rose champagne color that would be perfect for a New Year's party.

nails nailart nail art polish mani manicure Spellbound China Glaze Holiday Joy Collection color swatch Champagne Kisses Pure Joy gold rose red glitter Christmas New Year's Eve
One Coat; Shade

Champagne Kisses is a very delicate color, but one that doesn't get lost. There's no mistaking this for unpainted nails. This is a common problem I've had with skin toned glitters, but Champagne Kisses has just the right amount of sparkle to never go unnoticed.

nails nailart nail art polish mani manicure Spellbound China Glaze Holiday Joy Collection color swatch Champagne Kisses Pure Joy gold rose red glitter Christmas New Year's Eve
Two Coats; Sun

It's also a wonderful chameleon � subtly shifting colors in sun, shade, and artificial light.

nails nailart nail art polish mani manicure Spellbound China Glaze Holiday Joy Collection color swatch Champagne Kisses Pure Joy gold rose red glitter Christmas New Year's Eve
Two Coats; Shade
nails nailart nail art polish mani manicure Spellbound China Glaze Holiday Joy Collection color swatch Champagne Kisses Pure Joy gold rose red glitter Christmas New Year's Eve
Shade

If you want to create a truly stunning Christmas nail I recommend adding a coat of Pure Joy over two coats of Champagne Kisses. This will take a bit of dabbing and pushing, but it is so worth it in the end.

Color: Rose gold with a small amount of holographic.
Finish: Ultra-fine glitter
Application: Perfect application. It went on very smoothly and built up great.
Coats to Opaque: 3, but the small patches of two coats were only visible in macro.
My Rating (1-5): A very solid 4.5

Monday, 10 December 2012

Today's swatch from the China Glaze Holiday Joy Collection is Pure Joy.


nails nailart nail art polish mani manicure Spellbound China Glaze Holiday Joy Pure Joy color swatch glitter red gold christmas
Two coats of Pure Joy with two coats of top coat

Pure Joy is another of the glitters from this collection. It has a clear base with small red hex glitters and larger gold hex glitters.


nails nailart nail art polish mani manicure Spellbound China Glaze Holiday Joy Pure Joy color swatch glitter red gold christmas
One coat of Pure Joy; no top coat

This has good coverage with one coat. Not enough to be a one coat wonder but really good for a glitter. The small red glitters fill in nicely around the larger gold glitters. The gold glitters did need a bit of dab and drag to get them around the nail but I didn't have to dig for them. They came out of the bottle good; they just didn't want to spread out.

nails nailart nail art polish mani manicure Spellbound China Glaze Holiday Joy Pure Joy color swatch glitter red gold christmas
Two coats of Pure Joy; no top coat


nails nailart nail art polish mani manicure Spellbound China Glaze Holiday Joy Pure Joy color swatch glitter red gold christmas
Two coats of Pure Joy; two coats of top coat

I found that all the glitters of this collection needed two coats of top coat to get a smooth to semi-smooth finish. That said, I think this one was the best at accepting top coat. The glitter lay pretty smoothly on its own and the glitters left very few cracks between them for the top coat to sink between.

nails nailart nail art polish mani manicure Spellbound China Glaze Holiday Joy Pure Joy color swatch glitter red gold layered poinsettia christmas
One thin coat of Pure Joy; layered over two coats China Glaze Poinsettia

And just to show you how well this one layers, I put one very thin coat of Pure Joy over two coats of China Glaze Poinsettia. The only problem I had with this was that no matter how much I dabbed and pushed the glitters wouldn't stick to the polish around my cuticles. Not a big problem at all and the awesome shimmer effect of the red glitter more than made up for this!


Color: Small red hex glitters and larger gold hex glitters in a clear base.
Finish: Glitter
Application: Application was good. The glitter came out of the bottle nicely with no digging needed and only needed a bit of dabbing and pushing to get the gold glitter arranged around the nail. Builds up perfectly so it can be worn alone, but layers over other polish just as nicely.
Coats to Opaque: 2
My Rating (1-5): 4 � 4.5 if pushed. It's not a bad glitter, and it really is perfect for the holidays.

Friday, 7 December 2012

I'm really sorry about the lack of post yesterday. I was informed that someone on Facebook had stolen some of my nail photos, cut and smudged out my watermark, and was now claiming to have done them. Thank you again, Lacqueerisa, for letting me know! ? My photos have now been removed from her page, and I've informed as many other artists as I could of their stolen work. But enough about that!

nails nailart nail art polish mani manicure Spellbound color swatch China Glaze Holiday Joy Collection Winter Holly glitter green gold purple holo holographic

Today's post is a swatch of Winter Holly from the China Glaze Holiday Joy Collection. Winter Holly is a pretty deep green and gold glitter, very Christmas-y, with flares of holographic glitter mixed in. I also noticed a bit of purple glitter in the pictures but that may just be a trick of the light playing off the holo glitter.

nails nailart nail art polish mani manicure Spellbound color swatch China Glaze Holiday Joy Collection Winter Holly glitter green gold purple holo holographic

Here is one coat of Winter Holly. Two coats fills in nicely and takes care of all the patchiness so don't worry about how thin this goes on. Winter Holly dries pretty matte and will need a good top coat if you want it to really shine. I found my top coat settled around the glitter in visible dimples and needed two coats.

nails nailart nail art polish mani manicure Spellbound color swatch China Glaze Holiday Joy Collection Winter Holly glitter green gold purple holo holographic

I'm not sure how I feel about all the really fine glitters of this collection. Such fine glitter wasn't really made for layering so multiple coats are a must. Since I use two thick coats of glue base for glitters, along with my usual base coat, the added two or three coats of these glitters needed to get full coverage really makes my nails feel heavy and awkward. Along with the mentioned two layers of top coat needed to smooth everything ... personally, I think I'll be wearing these matte. All said though, they're so darn pretty that I can't help liking them!!

Color: Dark green and gold with flecks of holo and maybe purple.
Finish: Ultra-fine glitter; dries matte.
Application: Goes on smooth but patchy with one coat. Fills in nicely with two.
Coats to Opaque: 2-3
My Rating (1-5): 4

So, what do ya'all think of the new blog layout? I tried to keep it winter-y with only one or two Christmas touches.

Wednesday, 5 December 2012

We're up to M in the ABC Challenge. Getting ever closer to Z. :( I will be very sad to see the end of this challenge and may just start over on my own. There are so many amazing designs to do for each letter, and I don't think I'll be happy until I try them all. As for today's letter ...

M is for ... Mistletoe. I call this 'Kiss Me Under the Mistletoe'.

nails nailart nail art polish mani manicure Spellbound Sinful Colors Snow Me White Wet n Wild I Red a Good Book China Glaze Holly-Day L.A. Colors Black White green ABC Challenge M is for Mistletoe Kiss Me Under lips romance love Christmas Holiday glitter Pearl Harbor

This isn't my all time favorite design. I like the idea, but I wish I had thought the design out before jumping in. This is what happens when I don't sketch up my designs first.

nails nailart nail art polish mani manicure Spellbound Sinful Colors Snow Me White Wet n Wild I Red a Good Book China Glaze Holly-Day L.A. Colors Black White green ABC Challenge M is for Mistletoe Kiss Me Under lips romance love Christmas Holiday snow glitter Pearl Harbor

I do like the base polish. I went for a snowy effect using Sinful Colors Snow Me White and Pearl Harbor. Two coats of white with the iridescent glitter of Pearl Harbor creates a light dusting of snow over your nails. Perfect for winter. :)

Tuesday, 4 December 2012

Today's China Glaze Holiday Joy polish is by far my favorite of this collection. It was one I picked up completely on a whim, but I couldn't be happier.

nails nailart nail art polish mani manicure Spellbound China Glaze Holiday Joy Collection Christmas red shimmer glitter ruby Cranberry Splash color swatch review

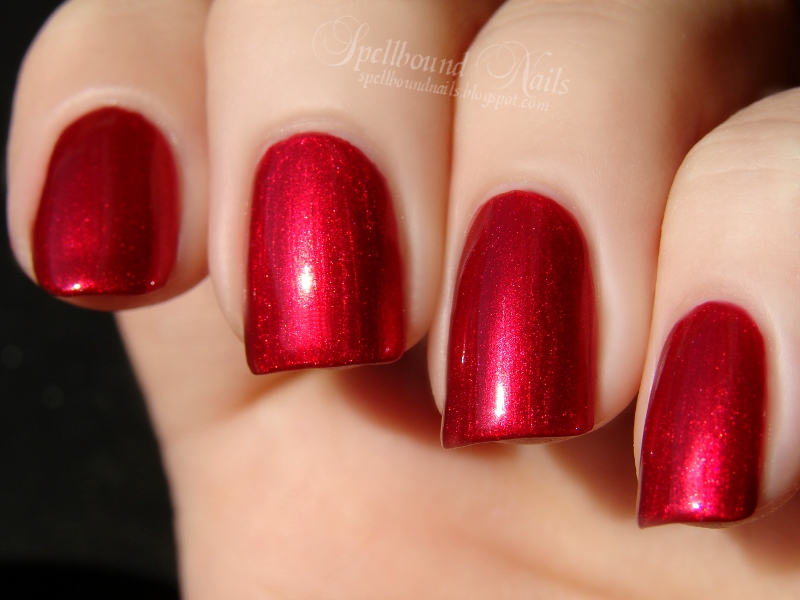
Meet Cranberry Splash, an amazingly beautiful ruby red shimmer. This is two coats of Cranberry Splash, picture taken in the shade. In some lights this polish looks almost liquid on the nails. Its shine is so intense and gorgeous.

nails nailart nail art polish mani manicure Spellbound China Glaze Holiday Joy Collection Christmas red shimmer glitter ruby Cranberry Splash color swatch review

This picture was taken in my lightbox. Polishes like Cranberry Splash, Christmas red with shimmer, are fairly common additions to most holiday collections. However, I find China Glaze has captured the most perfect shade of shimmery red for the holiday season.

nails nailart nail art polish mani manicure Spellbound China Glaze Holiday Joy Collection Christmas red shimmer glitter ruby Cranberry Splash color swatch review

This picture, taken in full sunlight, shows the wonderful shimmery side of Cranberry Splash.

Application was nearly perfect. It went on very smoothly and was easy to control. I find most red polishes have a messy application but Cranberry Splash needed next to no cleanup. There were a few streaks when I wasn't careful enough with the brush, but nothing too noticeable. I simply had to slow down a bit and apply from one side of the nail to the other instead of starting in the middle. This put a stop to any streaking and left behind a perfect finish. A top coat sealed it and gave it a shiny gleam.

All in all, China Glaze Cranberry Splash is a striking polish and will make a lovely addition to your nail polish collection. And just think how beautiful this color will look against some snow or in the presence of a lit and decorated tree during any holiday celebrations.


I'm attempting to start giving better, more thorough reviews instead of my usual 'it's pretty; go buy it'. I'm more than open to ideas on what a good review should include. If there's something you always look for in a review let me know and I'll try to include it in my upcoming reviews. Thank you!

Monday, 3 December 2012

I am finally going to begin posting the swatches for the China Glaze Holiday Joy Collection. I don't own the full collection, but you'll be seeing more than a few of the glitters.

nails nailart nail art polish mani manicure Spellbound color swatch China Glaze Holiday Joy Collection Christmas metallic Blue Bells Ring shimmer silver glitter

First up is Blue Bells Ring, an icy metallic blue. This is two coats, but Blue Bells Ring is a very opaque polish. I definitely could have gotten away wearing just one coat. 

nails nailart nail art polish mani manicure Spellbound color swatch China Glaze Holiday Joy Collection Christmas metallic Blue Bells Ring shimmer silver glitter

I was really pleased with how well this polish went on. It has a super smooth application. It didn't streak or turn gooey while I was applying. It also came off really easily. Be extra careful with any cleanup because the blue comes off first, leaving behind the silver metallic shimmer. That only took a few extra swipes to get up, but you can see near the cuticle of my pinky finger what happens when you get too close to the polish during cleanup.

The only problem I had, big or small, was staining! The blue, once it came in contact with my polish remover, went everywhere. It got all over my hands and fingers and it took an extra cotton ball per hand to get off. It's not a huge con when weighed against so many pros, but I will say don't remove this polish while wearing or even while you're near anything expensive or fancy.

Thursday, 29 November 2012

I'm really sorry for such a late night post guys, but I am so behind on picture editing. Still, I just couldn't put this post off another day. I entered into a Facebook flash giveaway from the Daily Lacquer last week totally not expecting anything, but I won! As one of three winners, I got to choose one bottle of Daily Lacquer's nail polish. Beyond exciting!! I decided to take a chance and ask for Maple Syrup from what was the then upcoming Buddy the Elf Collection. This collection is now out and selling like wildfire along with her Sailor Moon inspired The Lovely Moon Collection and The Holo-Day Lovelies Collection. She totally deserves some major kudos!

nails nailart nail art polish mani manicure Spellbound Maple Syrup Buddy the Elf Collection Daily Lacquer Lacquerista brown bronze gold orange red glitter Indie black Sally Hansen China Glaze green flash giveaway winner Holy Day Holy-Day Chocolate Creme

I can't compete with the awesomeness of Daily Lacquer's bottle photos, but I gave it a shot. I love these bottles. They are just the perfect fit-in-your-hand bottles, and they look pretty too! Made even prettier by that cute glued on bow. What's better than such a personal touch to every bottle?? You just don't get that from big name brands.

nails nailart nail art polish mani manicure Spellbound Maple Syrup Buddy the Elf Collection Daily Lacquer Lacquerista brown bronze gold orange red glitter Indie black Sally Hansen China Glaze green flash giveaway winner Holy Day Holy-Day Chocolate Creme

My first use of this beautiful brown/bronze/gold glitter was over China Glaze Holly-Day. This combination is such a rustic Christmas combo.

nails nailart nail art polish mani manicure Spellbound Maple Syrup Buddy the Elf Collection Daily Lacquer Lacquerista brown bronze gold orange red glitter Indie black Sally Hansen China Glaze green flash giveaway winner Holy Day Holy-Day Chocolate Creme

My next choice was brown. I used Sally Hansen Chocolate Creme. It went on a lot darker with two coats than it looked in the bottle. In the bottle it was a gorgeous chocolatey brown. On my nail it turned black.

However, this color change was a good thing. It shows just what a chameleon Maple Syrup truly is, because it didn't get lost in such a dark color! It actually spiced it up. In my opinion, this glitter can go over anything and look amazing.

Did I mention this is my first Indie polish? I'm happy to say all the hype is well deserved. Maple Syrup went on smoothly. It wasn't thick or gooey and had no overpowering polish scent like a lot of big name brands. The glitter applied really easily. I didn't need to dig at all for the larger glitters. And using two coats of glue before my base coat made removing the glitter a snap ... or rather a peel. :)

Tuesday, 20 November 2012

After the disaster of my last night sky nails I thought it was time to try again. What better time to post night sky nails than at night?

nails nailart nail art polish mani manicure Spellbound night sky sleep tight stars gradient China Glaze First Mate Secret Peri-Wink-Le Periwinkle blue white

I used China Glaze First Mate as my base color. I dabbed a very small amount of black around my nail near the cuticle to show some depth. The gradient was created by first mixing First Mate with some white and dabbing down my nail. China Glaze Secret Peri-Wink-Le was mixed with a very small amount of white and then a bit more to create the last two 'layers'. I used white polish and a sewing needle to dot the stars on, using more or less white to create larger or smaller stars. Be random. :)

Friday, 19 October 2012

The next in the Nail-Aween Challenge was a choice between ghost or goblin. I chose to do ghost, but I wanted to do something a bit different than simple ghosts on my nails.

nails nailart nail art polish mani manicure Spellbound character Casper Ghosts Stinky Stretch Fatso friendly

With this in mind I did Casper and the Ghostly Trio: Stretch, Fatso and Stinky. What I couldn't manage to get in the picture is the glitter. I used a glow in the dark glitter on the Ghostly Trio, not for the glow, but for the slightly green tinge and the small bits of glitter to give them a ghostly sparkle. I used Sinful Colors Pearl Harbor for Casper.

The other Sinful Colors I used is Snow Me White. I just picked this up in my last shopping trip since my China Glaze White on White has run out. I never seem to be able to get to Sally Beauty to pick up more, so I had to settle. However, settling really isn't a bad thing. I like the texture of China Glaze better but Sinful Colors is a really awesome one coat white. I used two coats just to be extra sure it was perfect since I was just doing lines, but one coat would have worked perfectly. If you are looking for a one coat white, Snow Me White is definitely it.

Wednesday, 17 October 2012

I had a few ideas on what to do for F in the ABC Challenge but the one that really stood out and begged to be done was frog. Not just any frog though, I wanted to do Blue Poison-Dart Frog nails. I actually want to do a collection of poison-dart frog nails.

nails nailart nail art nailpolish polish mani manicure Spellbound ABC Challenge f is for frog Poison Dart dots spots blue China Glaze First Mate Secret Peri-Wink-Le sponge sponged sponging gradient speckled speckles speckle

I started with a three coat base color of China Glaze Secret Peri-Wink-Le and used my trusty eyeshadow applicator to lightly sponge on China Glaze First Mate. I mixed Secret Peri-Wink-Le with a small bit of L.A. Colors white to create the lighter speckles. The black dots were created with my largest and my smallest dotting tools and done with L.A. Colors Black. I'm sure even those who don't know anything about frogs know that frogs have this slick, wet or slimy look about them so I used two coats of top coat to give these nails an extra froggy shine.

nails nailart nail art nailpolish polish mani manicure Spellbound ABC Challenge f is for frog Poison Dart dots spots blue China Glaze First Mate Secret Peri-Wink-Le sponge sponged sponging gradient speckled speckles speckle

I used this stock photo as my inspiration. As animals go, I'm pretty neutral about frogs. I don't have a fear nor would I scream if I saw a frog but I wouldn't want to run up and try to pet them like I would a dog. However, I do find some breeds, the poison-darts especially, of frogs stunningly beautiful. The poison-dart frogs all have such bright, bold, and beautiful colors and markings. I find them oddly like butterflies in this way, using their colors and markings to warn off predators.

Thursday, 4 October 2012

Last Saturday my mom, my niece and I went to a local festival called PotatoFest. It's one of my favorite fall festivals, second only to the Fall Foliage Festival happening this weekend. The city that holds the festival is the second largest supplier of potatoes in the state so it's kind of a big deal. PotatoFest is, naturally, all about potatoes and the people who grow them. The festival has food, crafts, and live bands that take up a few blocks of the city for just one day every year. My mom goes for the crafts but I go for the potatoes! Sweet potato fries to be specific. Also love the potato candy and the maple syrup booth with some of the most amazing lollipops in existence�maple lollipops!!

I couldn't let this day pass without some equally amazing nail art.

nails nailart nail art mani manicure Spellbound festival Mr Potato Head sweet potato fries food character China Glaze Desert Sun PotatoFest Mrs polish

What else could I possibly do for PotatoFest besides Mr. Potato Head nails? I used China Glaze Desert Sun as my base color. I wanted to give these nails more of a sweet potato coloring than the more brown color of regular potatoes. I added hearts to show my utter love of potatoes, especially sweet potatoes and sweet potato fries.

nails nailart nail art mani manicure Spellbound festival Mr Potato Head sweet potato fries food character China Glaze Desert Sun PotatoFest Mrs polish

This is my rarely seen right hand with Mrs. Potato Head and more hearts. I'm sorry for the poor lighting and the awkward angle of this picture. I was racing against the setting sun and my camera just wasn't made to be used by a left hand.