Thursday 30 August 2012


This is a reminder that The Great Sephora Giveaway is ending Saturday. Really, it ends midnight the 31st but midnight makes it September 1st, right? Either way, this is just a reminder to get your entries in before it ends.

I also want to thank all those who have already entered. Over 2500 entries? Nearly 300 GFC followers, 225 on Tumblr, and 29 Hellocotton as I'm typing this?? Plus all those who follow invisibly? You all have made this an amazing giveaway, and I couldn't possibly love you more!! ? I hope you all find something about my blog that will keep you following me. :)

Wednesday 29 August 2012

Wow, is it time for another post already? I was going to use yesterday to get my pictures all nicely resized and watermarked and, if I had some extra time, get a few posts typed up for auto-posting ... yeah, that didn't happen. Lol! I spent the past two days doing extreme cleaning. I don't know about you but cleaning makes me hungry and there's nothing better than a nice refreshing watermelon!


nails nailart nail art Spellbound mani manicure watermelon fruit green China Glaze Holly-Day Sally Hansen Green with Envy Funky Fingers Kingston realistic

This design was originally done by The Polish Well. I fell in complete and total love with this idea after seeing her nails posted on Beautylish. I debated doing them on my own nails since she had already done such an amazing job on them ... but you should know by now that I have no impulse control. I couldn't resist.


nails nailart nail art Spellbound mani manicure watermelon fruit green China Glaze Holly-Day Sally Hansen Green with Envy Funky Fingers Kingston realistic

I knew immediately that I wanted to use Funky Fingers' neon Kingston for the flesh of the watermelon. For the skin, I decided to go slightly more realistic by using China Glaze Holly-Day as a base and dabbing on a light speckling of Sally Hansen Green with Envy. I also used this color to draw the squiggles onto the watermelon.

I wish I had had a watermelon on hand (no pun intended) so I could have pictures of this mani next to a real watermelon. My family were amazed at how real they looked when we went shopping while I was wearing this mani.
"Do you mean you can't, or you won't?" - one of those annoying things grown-ups say when you don't want to do something. Majority of us have heard ourselves say: "I can't....I'm too busy/don't have enough time," and I'm quite guilty of this! But lately I've been trying to break the cycle of saying no. Now, I'm not the most spontaneous person; however I have found that saying yes really can benefit you.

I first found out about this whole concept of saying yes more, was when I picked up last months copy of Boots own Health & Beauty magazine. There was an article on a campaign they're doing this summer called 'Say YES to summer'. It really inspired me to be more spontaneous and think positively.

As a young person in this day and age, I know & empathise with how easy it is to feel negatively about things such as the future. Less and less jobs are available, more graduates are unable to find work and I feel that there's just not a lot of support for young people out there. So keeping motivated and saying yes isn't easy, but hopefully this post will help.

So my aim over these past couple of months was to say yes and to embrace those spontaneous moments.
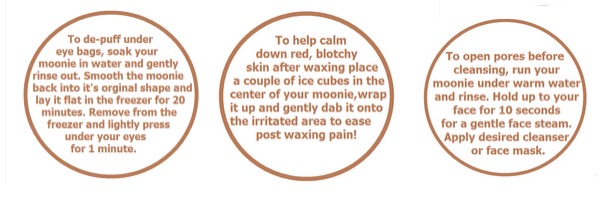
1. I said yes to starting my own business 'Moonie'. I had to put aside negative thoughts and be brave. It was definitely worth taking the risk, and now it's up and running I'm so happy I turned my idea into a real business.
2. I've always enjoyed reading but I hadn't read a book in ages, I kept putting it off because I was just too busy. So, I donated some old books to a charity shop and replaced them with new ones. I make time for reading now and I have also said yes to buying a subscription to Company magazine.
3. This week I said yes to trying something new. I treated myself to a nail varnish, it's a dark purple colour - something I'd never really wear but it's a refreshing change from what I'd normally choose.(and it was half price!)
4. When asked if I wanted to take part in a charity walk for Macmillian Cancer Support I said yes! It's in October so I've got a bit of time to prepare my lazy body.

After just a few months of thinking more positively and saying yes it has changed me so much! Simple changes to your life can make a big difference. Even the little things like treating yourself to a pamper session or a bright lipstick. Why don't you call that friend you haven't spoken to for ages or take a day trip somewhere you've always wanted to go? Next month I'm going to say yes to clearing my wardrobe of old clothes - something I've been meaning to do for a year now! 


What will you say yes to this week?

* P.S It may look like it, but this is not a sponsored post! Boots haven't told me to write this, I'm not affiliated with the company. It's simply something I wanted to share with you!

Monday 27 August 2012

I'M BAAACK!!! Well, I've been back for a week but I needed time to mourn the loss of the beach. I missed it horribly this week. Gasp, I didn't even want to do my nails this week! However, that's over with, and I'm ready to get back into my usual posting schedule. I have a few nail designs saved up for you but I want to share my beach nails in this post. The design for this post was inspired by Neon Rays by Chloe's Nails. I thought they were the perfect nails to arrive at the beach with. And these nails are amazingly easy to do. The hardest part was actually cutting the tape since I don't own any striping tape.

nailart nail art nails mani manicure Spellbound Neon Sunbeams Rays Sunrays China Glaze Funky Fingers Color Club Taped Taping Tape orange green yellow pink hot black white Sun Worshiper Kingston Yell-Oh!

I'm not sure where the idea came from, I remember reading it on a blog somewhere, but the easiest way to cut the tape is to take a strip of the tape and place it on a sheet of wax paper. That way the tape doesn't stick to your scissors and you can get nearly perfect 'beams' every time. Simply peel them off once your base polishes are dry and create the beam pattern. I used the fairly standard beam pattern but you could turn the beams around, do different beam patterns on different nails or even do something else like zigzags.

nailart nail art nails mani manicure Spellbound Neon Sunbeams Rays Sunrays China Glaze Funky Fingers Color Club Taped Taping Tape orange green yellow pink hot black white Sun Worshiper Kingston Yell-Oh!

Speaking of the base polishes, you gals should know by now that I always use two (or more) coats of white to make the neons pop. This time I used two coats of China Glaze White on White. The neon polishes are China Glaze Sun Worshiper, Color Club Yell-Oh! (which looks slightly green to me and these pictures agree), and Funky Fingers Kingston. I didn't do or use anything special to get the polishes lined up on my nails. I tried using a nail art brush but they were simply too small to work with so I used the polish brush and carefully painted stripes on either side of my nail and finished with a stripe down the middle. These colors took two coats and I was extra careful with the final coat to touch up any mistakes I made with the first. It may sound daunting and there is a moment of panic before you begin (how could such a large brush make three lines without overlapping horribly?) but it's really not once you start! Trust me! You will want to be careful with the wider brushes such as some of the Sally Hansen brushes and the Wet n Wild Pro brushes. If you just have to use one of these brushes try tipping the brush in it's side. That will give you a slimmer brush to work with.

nailart nail art nails mani manicure Spellbound Neon Sunbeams Rays Sunrays China Glaze Funky Fingers Color Club Taped Taping Tape orange green yellow pink hot black white Sun Worshiper Kingston Yell-Oh!

Let your base polishes dry. You can add a top coat before taping for extra protection against chips and bleed through and also to give a smoother finish if you like. After your polishes are dry simply tape your pattern. Make sure the tape lays flat and remember to fold the ends of the tape over your nail tips and work it into the creases of your fingers. Coat your nail (and the tips of your nail between the tape) in your top polish. I chose black but again it doesn't have to be black. Once you have your top polish on immediately remove your tape. I use a pair of tweezers to grasp the tape (less messy and a smaller chance of smudging already completed nails) and get best results when I pull the tape slowly and smoothly back over my nail from the tip ... much like waxing in slow motion. :)

Thursday 23 August 2012

I bloody love face masks. They are an essential part of my skincare routine and i try to use one at least once a week. Recently i've discovered a few tips that have made applying/removing face masks SO much more easier and enjoyable!
 The latest face mask i've been testing out is this Sea Mask from Mudd. It comes in a re-usable pack which gives you up to 5 applications- I think this is a great idea as I normally only use half of a face mask then have to leave the rest in the pack for another day! So, here's how I apply and remove face masks effortlessly.

  • After i've cleansed my skin, I soak a Moonie face cloth in warm water then rinse out and hold it up to my face for 15 seconds. The natural muslin fabric makes it perfect for a gentle face steam which opens up pores, allowing the face mask to penetrate deeper so my skin can get the full benefit.
  • Using a flat foundation brush, I squeeze the mask directly onto the brush and apply it to my face. This lets you control where you place the product and get a nice even coverage- no messy fingers! 
  • Once the mask has dried, I re-soak my Moonie in warm water and rinse out. I then place it over my face for 15 seconds to soften the mask, I find this makes it easier to remove. Next, with the same Moonie I wipe away the mask. 
  • Lastly, I splash my face with cool water to close pores. Hello smooth and refreshed skin!
Ta-dah! Ok, so it's not really exciting but i had to share it with you because it makes using face masks effortless! 

Mudd Sea Mask 5 pack retails for �3.05 from Boots/Superdrug. Moonie face cloths retail for �5.99 from www.moonie.bigcartel.com (FREE P&P & gift with every purchase) 


What are your face masks tips, do you use this method?

Tuesday 21 August 2012

You probably already know that Liz Earle have recently launched a range of make up products. I like their skincare products so I was excited to find out about the new make up line!


I'm not really a fan of lip glosses, I'd rather wear lipstick or just a lip balm. I like the fact it comes in a blue box, makes it feel more expensive! However I don't like the tube packaging, the sparkly dark blue lid and silver line all feels a bit outdated to me. But, I guess their target audience is older women. I found this lip gloss applied smoothly and didn't feel too heavy on my lips.The gloss is quite sheer and adds a subtle hint of pink/gold. One thing I do like about this product is that it contains avocado oils and shea butter which makes it quite moisturising and not overly sticky. In my opinion this is a little pricey for a lipgloss. I like this, but I didn't think it was anything special, sorry Liz! 

Sheer Lip Gloss retails for �13.50 (5ml) and comes in 12 different shades.

What do you think of the new make up line from Liz Earle? Anything tickle your fancy?
Pr sample

Friday 10 August 2012

Hello (and goodbye) girlies. I leave early tomorrow morning for a lovely week-long beach vacation, so this is my last blog post until I get back. I'm hoping to stay in contact through my Facebook page though so check there if you need me or just want to see beach pictures. :)


nails nailart nail art Spellbound mani manicure China Glaze On Safari Collection Adventure Red-y Elephant Walk polish nailpolish

First off, painting your nails outside? Not as great as it sounds. Even less so on a hot day. The heat of the day and the cool breeze I enjoyed so much played havoc with this polish. It started drying on the brush after just one swipe onto my nail and bubbled like crazy! I was so disappointed because this is such an amazing color. I wanted to keep it on for at least another day or two, but I just couldn't stand the bubbles.


nails nailart nail art Spellbound mani manicure China Glaze On Safari Collection Adventure Red-y Elephant Walk polish nailpolish

But enough ranting! This is the last polish I own (besides the glitter and I have something special planned for that) from the China Glaze On Safari collection. It's probably my second favorite color, after Exotic Encounters. It looks fairly plain at first being a soft grey creme with a very light silver shimmer. However, upon closer inspection it has a slight leaning towards green in certain lights. As for the shimmer ... well, have a closer look.


nails nailart nail art Spellbound mani manicure China Glaze On Safari Collection Adventure Red-y Elephant Walk polish nailpolish


nails nailart nail art Spellbound mani manicure China Glaze On Safari Collection Adventure Red-y Elephant Walk polish nailpolish

These are an up close look at this silver shimmer in direct sunlight. In shade it's a fairly nondescript silver shimmer, but it comes alive in sunlight.


nails nailart nail art Spellbound mani manicure China Glaze On Safari Collection Adventure Red-y Elephant Walk polish nailpolish

This isn't my best tribal design. I ran out of original ideas after the first two or three polishes of this collection, but I do love how the red of Adventure Red-y looks against the soft shimmery grey of Elephant Walk. It's a striking combination.
That first day on the beach can be very daunting, baring all with pasty skin can make you wish you booked that skiing holiday in the Alps. Thank god for fake tan. I've discovered Xen-Tan through beauty blogs and i'm so glad i did!  I've been using the Xen Tan Mist Intense prior to my holiday to Corfu this week. It claims to be a weekly self tan, i'll let you know how i get on.
The product comes in a handy spray bottle. The colour is instant so it's easy to see where you have/haven't applied the fake tan. It has a lovely vanilla scent like the rest of the Xen-Tan range, however this doesn't last long on the skin which is a shame. My favourite thing about Xen-Tan which makes it different to other fake tans is that it creates a nice deep olive colour with no orange under tones. I use a mitt to apply this, bought a simple one from the 99p store which does the job. I'm really pleased with how natural the colour looks, it will definitely help boost my beach body confidence! I forgot to take a before and after picture but i'll get one on holiday. I really recommend Xen-Tan, possibly my favourite brand for fake tan!

Xen-Tan Mist Intense Dark retails for �21.95 but is �17.99 on the Feelunique Site!

Are you going away on holiday this year? What are your beach beauty essentials?
UPDATE: I'm back from my holiday now and i can safely say applying this before i had to strip down to a bikini definitely gave me more confidence. This claims to be a weekly tan but i'd say on me it lasted around 4 days. I did also find with this the morning after you had to wash of the top layer to reveal a more natural looking tan. Overall, very impression with this & will continue to use it to keep my tan on longer! 
*item won in giveaway

Wednesday 8 August 2012

Hello girlies! Another post, another day closer to my vacation. This just leaves one more post (Friday's post which will be set for auto-post) until I get back. I may post a few beach pictures to my Facebook page if anyone is interested.


neon Sun Worshiper China Glaze On Safari collection nails nailart nail art mani manicure tribal Autumn Summer Spellbound Jungle Queen

This is Jungle Queen from the China Glaze On Safari collection. I love purple nail polish so it really goes without saying that I love this color. It looks stunning in the sun, doesn't it?


neon Sun Worshiper China Glaze On Safari collection nails nailart nail art mani manicure tribal Autumn Summer Spellbound Jungle Queen

It left me a bit wanting indoors. The color is still pretty, a greyish purple, but it lost all it's brightness and shimmer. It was ... dull. With this in mind, I just had to do something to brighten it up.


neon Sun Worshiper China Glaze On Safari collection nails nailart nail art mani manicure tribal Autumn Summer Spellbound Jungle Queen

After painting my fingernails, I moved onto painting my toenails with the standard summer neon - Sun Worshiper. Well, some of that awesome neon orange speckled onto Jungle Queen. It was certainly eye-catching and just wouldn't come off. I had an idea. I thought was barmy at first and tried to resist the urge.


neon Sun Worshiper China Glaze On Safari collection nails nailart nail art mani manicure tribal Autumn Summer Spellbound Jungle Queen

However, the urge to do Jungle Queen's tribal design in Sun Worshiper proved to be too strong. There was no resisting, and I'm really glad I didn't because this looks amazing in my opinion. It adds just the right touch of summer to this fall color.

Tuesday 7 August 2012

I wasn't sure how this post was going to go down. But the last one i wrote a few months ago got a lot of love and i think a bad review is just as valued as a good review. 
I feel bad about writing negative reviews on products I've been sent as they've gone to a lot of effort to send me a product to try. Normally if i don't particularly like a product it either goes to the back of my shelf or to my mum! However, I've decided as long as i don't say 'This product will make your face drop off' (unless it does) giving an honest review of why something didn't work for you is fine. Just because a product doesn't work for you doesn't mean if won't work for someone else. And it's also good constructive criticism for the company. 
 So here are my opinions on some Pr samples I've been sent recently. 
Witch Blemish Stick �2.89
Firstly, I like this blemish stick. I think it does help reduce blemishes but the thing that really niggles me is the product design. At first i thought it was going to have a twisty applicator but no; you have to push the base of the product so the blemish stick comes out the top. Once that's happen you have no way of getting it back down again. So like when you twist a glue stick up too far and put the lid back on with twisting it back down - you have to do that! The product swishes in the lid and gets around the edges. Bit annoying! 
Trilogy Botanical Body Wash �16.50
This is the second Trilogy product i've tried. I love shower gels that smell nice & this one does however after using this my skin felt really dry and tight. I've never had this problem with a body wash before. I just can't seem to get on well with this brand, would love to hear your thoughts on Trilogy. Comes in a nice big 500ml bottle.
Collection 2000 naturally Matte Foundation in Ivory �2.99
I normally rave about Collection's products but this was such a fail. Ivory is the lightest shade & it's extremely dark! I have quite fair skin but this is ridiculous, no ones skin is this colour! Reviewed here.

GOSH On Stage Lip Jam �6.29
I'm not the biggest lip gloss lover, but i really didn't get on well with this. The formula is really heavy and sticky. I wore this whilst having my hair down and my hair kept sticking to my lips, not nice! Although i do like the bubblegum scent. 
Shizzle Lips Lip foils �12.50
Since reviewing these a few months ago, I haven't used them since. I really wanted to love these but i just couldn't get them to work. After 10 attempts it looked okay but the foil didn't cover my lips completely and my lips felt sore from trying to remove the foil and using the glue it came with. 

What do you think of these types of blog posts?

Monday 6 August 2012

Wow! This is my 100th post according to Blogger ... and it is so late! I'm really sorry about that but vacation is coming at a fast clip and I spent all weekend doing some last minute shopping. More on that later. For now, onto the post!


On Safari China Glaze collection khaki color nail polish nailart nails art tribal leopard print Spellbound swatch

This is Kalahari Kiss, another from China Glaze's On Safari collection. I really didn't expect to like this as much as I did. I really didn't expect to like this collection as much as I do! When I first picked up Kalahari Kiss I thought it might pass as a twin of Revlon's Bare Bones but it is far from the shade of Bare Bones.


On Safari China Glaze collection khaki color nail polish nailart nails art tribal leopard print Spellbound swatch

Kalahari Kiss goes on a khaki color. It's a really weird shade that I thought would completely clash with my skin tone but was actually really complimentary.

On Safari China Glaze collection khaki color nail polish nailart nails art tribal leopard print Spellbound swatch

Kalahari Kiss makes a great leopard base, especially when using Desert Sun from the same collection and an unnamed black.

On Safari China Glaze collection khaki color nail polish nailart nails art tribal leopard print Spellbound swatchI'm disappointed that I didn't do all the nails leopard print. After having to carefully use a Q-Tip and some nail polish remover to take off the first (really horrible) design there was no removing this one unless I wanted to start all over. The last thing I wanted to do was start all over.

For those wondering about my vacation, I'll be leaving early Saturday morning and won't get back until Sunday the following week. What that means is that this week's posts will likely be my last for a few weeks. I was horrified last year to come back with my nails a ragged mess. I'm honestly expecting no less this year. Nails just don't take well to hours and days submerged in sea water ... any water really. If anyone knows of things I can do (besides staying away from the water) that will keep my nails from being completely destroyed I would love to hear them before I leave!!

Friday 3 August 2012

After months & months of keeping this under wraps, today is the official launch of my new handmade product, Moonie! A few weeks ago I mentioned in a post that I was going to launch my own skincare product, so this is it! Probably not what you were expecting? A Moonie is a natural, un-bleached face cloth made from muslin. It's designed to revolutionise the way women look after the skin. I wanted to make people aware of the benefits using a Moonie has on the environment and of course, their skin. Using a Moonie is a great alternative to a half-hearted swipe of a face wipe and it has so many different uses. I've included some tips below on ways to use a Moonie.Those were just a few ways you could use your Moonie. They can be used as an everyday essential or a weekly treat. 

I just asked on twitter if you had any questions about Moonie, as promised here are my answers!
I decided to invent a Moonie as I wanted to make face cloths cool again. Nowadays, using a face wipe is really popular way to cleanse skin but the truth is it won't look after your skin as good as a Moonie will. I've also noticed recently a change in the sort of make up we buy and how we wear it. Sheer, light coverage foundations and BB creams have taken the market by storm. Some people have ditched foundation completely! I want you to be able to feel confident wearing a lighter base and I believe that all starts with a good skincare routine. Great skin doesn't have to be complicated, that's my inspiration behind Moonie.
Moonie is suitable for ALL skin types, they don't contain any nasty chemicals so wont irritate your skin. However if you have extremely sensitive skin I would recommend using a Moonie just 1-2 a week.
I was in my kitchen, looking for something to eat, as you do! The radio was on in the background and they were discussing how flannels aren't popular any more and how young people in particular never use them. I had a think about it & completely agreed with everything they were saying. I don't use a flannel & none of my friends do either. I kind of associate them with old people! I wanted to make flannels cool again so started brain storming different ideas, experimenting with designs, shapes, materials,names etc. After coming up with the final design I had to work out how to make it, this was the hardest part! I saved up some money & bought an overlocker sewing machine so I could hand make my Moonies. Once I figured out how to produce them I went about sourcing packaging, materials, labels and coming up with the brand name 'Moonie'. It took me a while to come up with my final design. Setting up a business is a lot harder then I ever imagined, but SO exciting! 
Moonie is currently only available to purchase in the UK. However I do have plans to ship international in the future! 
I really wanted to have a 'face' for the brand. So like Rimmel have Kate Moss and L'oreal have Cheryl Cole, I needed my own person! I didn't want it to be myself so I decided to make Neil. He's so cute & I think fit's in nicely with Moonie! 
Neil believes great skin shouldn't be complicated so he is a great ambassador for the product. He has his own twitter account so you can follow what he gets up too- @neilmoonie Or you can even add him as a friend on facebook
I hand make every single Moonie with care and the highest quality materials sourced in the UK. Moonies come in packs of three so you can alternate easily between washes. A pack of 3 Moonies retails for �5.99, that's just �1.99 per Moonie! Currently as a special offer, postage is completely FREE to UK residents! Be quick as this offer wont last forever & i have limited stock!
Kia & Neil x

So what do you think?!
Moonie All Design Rights Reserved Kia Simpson 2012

Wednesday 1 August 2012

Hello again girlies and welcome to my new followers. This is another On Safari swatch. We're coming to the end of the polishes I own from this collection. I'm sad to see them go, but I'm also looking forward to doing some nail art that isn't tribal. I'm running out of unique tribal designs. :)


This is Adventure Red-y. I'm not usually one for red, but I love this color! I don't know what it is about Adventure Red-y that is so different from all the other reds I've tried but there's just something so unique that makes it amazingly eye-catching.


I had no problems getting full coverage with just two coats. It also went on smoothly with no bubbles or pulling up. I did have problems with drying time but I give credit for that to the heat and humidity around here.


I love this design and it looks so great in these pictures. However, in person it was impossible to see unless you were nose to my fingers.


The black design darkened this pretty red to something that I just couldn't be happy with ... no matter how much I loved the design.


Still, this is one of the only reds I will use on my nails so that has to say something. If you haven't picked it up yet I definitely recommend doing so. :)